Before you reach for that bottle of bright blue drain cleaner under the sink — stop. Those chemical products work by generating heat inside your pipes to dissolve clogs, and they can also corrode older metal pipes, warp PVC fittings, and damage the rubber gaskets inside your P-trap. On top of that, they're genuinely dangerous to handle. One splash back and you've got a chemical burn to deal with. There's almost always a better way.
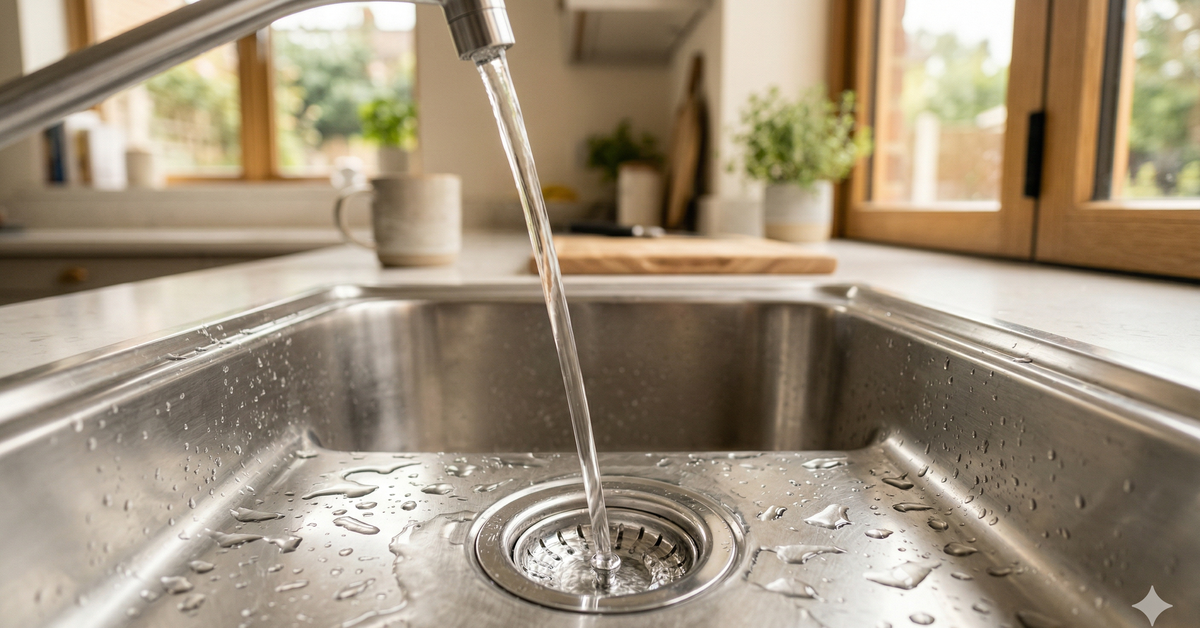
The good news is that most household drain clogs are not mysterious or complicated. They're hair, soap scum, grease, food scraps, or some combination of the four. Once you understand what's actually in there, clearing it out is usually a twenty-minute job with tools you either own or can buy for less than a cup of coffee. Let me walk you through the full escalation — from the simplest fix to the ones that require actually getting under the sink.
Start by Figuring Out What's Actually Clogged
Before you do anything, check whether the clog is in one drain or several. If only your bathroom sink is slow, it's a local clog somewhere between the drain opening and the P-trap. If your sink, shower, and toilet are all sluggish, you've got a bigger issue further down the line — possibly a main drain blockage — and the techniques below won't help. In that case, skip to the "when to call a plumber" section.
For a single slow drain, the fix depends a lot on which drain it is:
- Bathroom sink or shower — almost always hair, soap scum, and toothpaste buildup
- Kitchen sink — almost always grease, food particles, or coffee grounds
- Toilet — something that shouldn't have been flushed, or too much paper at once
- Laundry drain — lint and detergent residue
Knowing the type tells you what tool to reach for first.
Method 1: Boiling Water (Start Here for Kitchen Drains)
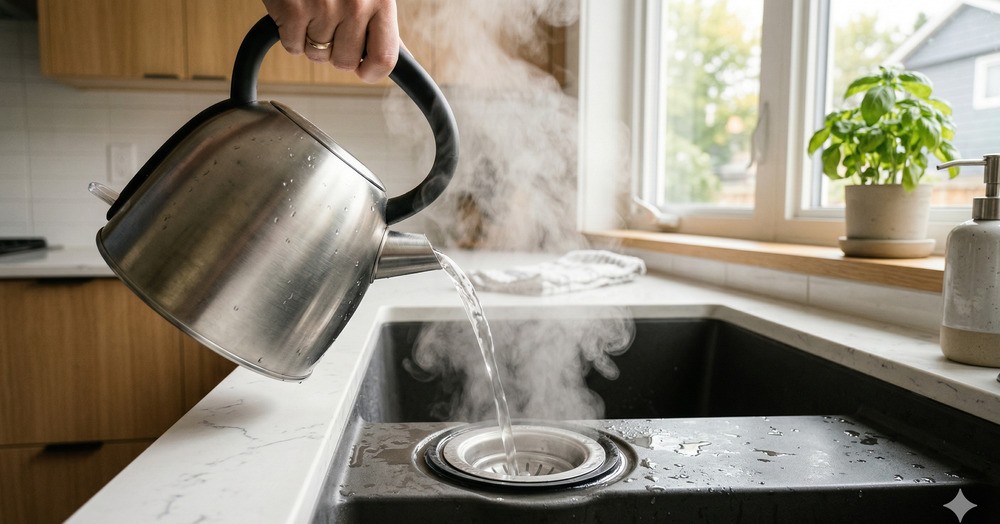
For a slow kitchen drain, the first thing to try is also the easiest: boil a full kettle of water and pour it slowly down the drain in two or three stages, letting it sit for a few seconds between pours. The heat melts and flushes out accumulated grease and soap buildup, which is the most common culprit in kitchen sinks.
One warning: don't do this if your drain is connected to PVC pipes and you have a garbage disposal or any plastic connection right below the sink. Near-boiling water can soften or warp certain plastics over time. Use very hot tap water instead — it's not quite as effective but it's safe. If you have metal pipes all the way down, boiling water is fine.
Method 2: Baking Soda and Vinegar
This one gets recommended all over the internet, and it does work — but only for mild clogs and buildup. Think of it as maintenance, not rescue. For a fresh, minor slowdown, it can make a real difference.
Pour about a half cup of baking soda down the drain, followed by a cup of white vinegar. You'll hear the classic fizzing chemistry-class reaction. Cover the drain with a plug or a wet rag to force the reaction downward instead of up and out. Let it sit for fifteen minutes, then flush with a kettle of hot water.
What this method is good for: soap scum buildup, minor grease, and mild odor. What it's not good for: a fully blocked drain or anything involving hair. If this doesn't work in one try, move on — don't keep pouring more baking soda hoping it'll eventually break through.
Method 3: The Plunger (Yes, for Sinks Too)
Plungers aren't just for toilets. A cup-style plunger works great on sinks and tubs, provided you do a few things right. Most people fail at plunging because they skip the setup.
First, if your sink has an overflow hole (the little opening near the top of the bowl), stuff a wet rag firmly into it. If you don't block the overflow, the pressure from the plunger will just vent out that opening and nothing will happen in the drain. This is the single most common reason plunging a sink doesn't work.
Second, make sure there's enough water in the sink to cover the bottom of the plunger cup — you want a water seal, not an air seal. Then place the plunger over the drain opening, press down to create a seal, and work the handle up and down vigorously for about 20 seconds. On the last pull, yank the plunger up hard to break the seal and hopefully pull the clog with it.
For double kitchen sinks, you have to plug the second drain the same way, or the pressure will vent through it. A wet rag stuffed in there works.
Pro Tip
Use a separate plunger for sinks and toilets. Seriously. Label them if you have to. Cross-contamination between your toilet plunger and the sink you brush your teeth in is not something you want to think about. A dedicated sink plunger is usually smaller and cup-shaped; a toilet plunger has a flange that folds out of the bottom.
Method 4: The Zip-It (Best Five Dollars You'll Spend)

For any bathroom sink or shower that's slow because of hair, skip everything else and get a Zip-It. It's a thin plastic strip about two feet long, covered in small barbs, that you push down the drain and pull back up. It costs about five dollars at any hardware store. The amount of hair and gunk it pulls out on the first try will shock you — it's disgusting and deeply satisfying at the same time.
To use it: push it straight down into the drain, past the stopper if you can, until you feel some resistance. Wiggle it a little, then slowly pull it back up. The barbs grab hair on the way out. Wipe it off with a paper towel and repeat two or three times until you're not pulling much out anymore. Then run hot water to flush anything left behind.
One note: for sinks with pop-up stoppers, you may need to remove the stopper first. Most just lift straight out or unscrew with a small nut under the sink — it takes about sixty seconds and gives you clean access to the drain opening.
Method 5: A Hand Auger (Drain Snake)
If you've tried the easier methods and your drain is still sluggish, it's time to escalate to a hand auger, also known as a drum auger or drain snake. These are simple spring-steel cables in a small hand-cranked drum, and they run twenty to thirty dollars for a basic twenty-five-foot model. Every homeowner should own one.
Feed the cable into the drain until you hit resistance. Lock the cable at that point, turn the crank clockwise to work the head into the clog, then reverse and pull slowly. Sometimes the clog comes out on the end of the auger; other times it just breaks up enough to flush through. Either way, follow up with a few minutes of hot water running down the drain.
For tubs specifically, you'll need to remove the overflow cover plate (two screws) and feed the auger down through the overflow, not through the drain opening. The trap geometry under a tub makes the drain opening a dead end for augers. This trips up a lot of first-timers.
Method 6: Clean the P-Trap Yourself
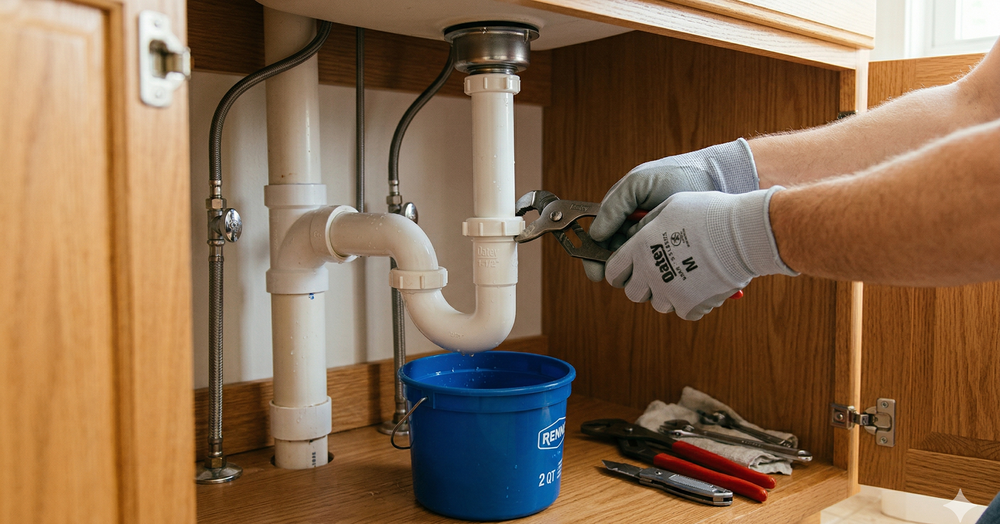
If nothing else has worked on a sink and you're pretty sure the clog is local, you can take apart the P-trap — the U-shaped pipe under the sink — and clean it out by hand. This sounds gross and intimidating, and it is a little of both, but it's also the most reliable fix and takes about fifteen minutes.
Put a bucket under the P-trap to catch water. Most modern P-traps have plastic slip-nut fittings you can unscrew by hand, or with tongue-and-groove pliers if they're stuck. Loosen the nuts on both ends of the U-bend and lower the trap into the bucket. Water will come out. That's expected.
Look inside the trap. You'll almost certainly find the clog right there — hair, soap, food, whatever it is. The trap is specifically designed to be the lowest point so stuff settles there. Clear it out with a bent wire, a bottle brush, or your fingers (wear gloves). Rinse the trap, inspect the gaskets on the slip nuts for cracks, and reassemble. Hand-tight is tight enough on plastic fittings — don't crank them with pliers or you'll crack the threads.
Run water and watch for drips around the slip nuts. If you see any, tighten slightly. If you still see drips, the gasket may be worn — replacement gaskets cost under a dollar at any hardware store.
What to Avoid
A few things I'd steer clear of, even when you're frustrated:
- Chemical drain cleaners. Already covered, but worth repeating. They can damage pipes, create dangerous fumes, and if they don't clear the clog, you now have a sink full of corrosive liquid that the plumber will have to deal with.
- Coat hangers. Yes, I know this is a classic DIY move. They can scratch porcelain and, worse, they can get stuck. A five-dollar Zip-It is purpose-built and far safer.
- Pressurized "drain blasters" or CO2 cartridges. These can crack older pipes, blow out compromised fittings, and spray sewer water in your face. Skip them.
- Enzyme cleaners as a rescue tool. Enzyme-based drain maintenance products are fine for prevention, but they work too slowly to fix an active clog. Use them monthly as maintenance, not as an emergency fix.
Prevention: The Real Win
Most drain clogs are preventable if you're slightly more careful about what goes down them:
- Put drain screens on every drain. Two dollars each, they catch hair and food before it becomes a problem.
- Never pour grease down the kitchen drain. Pour it into an old can and throw it in the trash once it solidifies.
- Run hot water for thirty seconds after every kitchen use. It helps keep grease moving through and out of the pipe.
- Flush drains monthly with very hot water. A kettle per drain, once a month, takes five minutes and prevents most buildup.
- Clean bathroom sink stoppers every couple of months. Pull them out, rinse off the hair, and put them back. It's a two-minute job that prevents ninety percent of bathroom sink clogs.
Pro Tip
If you have a garbage disposal, never put fibrous foods (celery, onion skins, corn husks), starchy foods (potato peels, pasta, rice), or coffee grounds down it. They don't grind well and they all contribute to stubborn clogs further down the line. Disposals are for small scraps and rinsing, not for bulk food disposal.
When to Call a Plumber
If you've worked through these methods and the drain is still slow, it's time to call a pro. Specifically, call someone if:
- Multiple drains are slow at the same time — this points to a main line issue
- You're getting sewer smells even when the drain is empty
- Water is backing up into a different fixture when you run one (shower filling up when the toilet flushes)
- You can hear gurgling from other drains when you run water
- You've taken apart the P-trap and the clog is further downstream than you can reach
These are signs of a main drain or sewer line issue that requires a professional auger, a camera inspection, or both. Check out our guide on DIY vs. hire a plumber for a fuller breakdown on knowing when to make the call.
For the ninety percent of clogs that are local, though, the methods in this article will get you unstuck without chemicals, without damage, and usually in under half an hour. Your pipes, your lungs, and your wallet will all thank you.