Caulking is one of those skills that looks easy until you try it. Then you end up with a wobbly, lumpy line, smeared fingers, and a tub surround that somehow looks worse than it did before you started. I know, because that was my first three attempts. The good news is that good caulking comes down to a handful of small tricks — the kind of thing a pro learns on their first job and no one ever writes down. Once you know them, you can get clean, watertight lines on your very next project.
A good caulk joint keeps water out, blocks drafts, and makes a room look finished. A bad one does the opposite: it traps moisture, peels off within a year, and draws your eye to every corner of the bathroom. The difference between the two isn't talent — it's technique. Let's walk through how to actually do it right.
Picking the Right Caulk for the Job

This is where most beginners go wrong before they even pick up the gun. There are about a dozen types of caulk on the hardware store shelf, and they are absolutely not interchangeable. Using the wrong one is why that caulk line you put in last year is already peeling.
100% silicone caulk is what you want for any wet area — tubs, showers, sinks, and anywhere water regularly touches the joint. It's waterproof, flexible, and mold-resistant. The downside is that it can't be painted over and it's harder to tool cleanly than latex. If you see the word "kitchen and bath" on a silicone tube, you're in the right neighborhood.
Siliconized acrylic latex (sometimes labeled "latex plus silicone") is the go-to for interior trim, baseboards, crown molding, and anywhere you want to paint over the caulk afterward. It cleans up with water, smooths out beautifully, and takes paint in a few hours. Use this for all your paint-grade finish work.
Polyurethane caulk is for exterior joints that see real weather and movement — like siding, trim, and around exterior doors and windows. It's tougher than silicone and bonds aggressively, but it's also messier to work with, so I'd save it for outdoor jobs where durability matters more than a perfect finish.
Whatever you choose, check the expiration date on the tube. Caulk goes bad. An old tube will come out chunky, refuse to skin over properly, or crack within months of application. If the tube is more than a year old and has been sitting in your garage, just toss it.
The Tools That Actually Matter
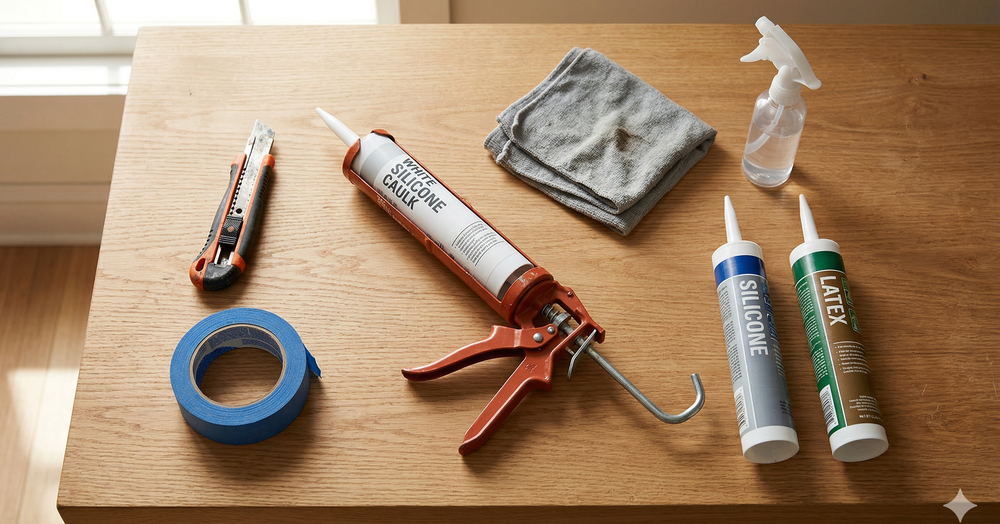
You don't need much, but the small stuff matters more than you'd think:
- A good caulk gun — Skip the cheapest one. A dripless gun with a smooth rod (not a ratcheting one) gives you way more control. Expect to spend fifteen to twenty-five dollars and thank yourself later.
- Utility knife — For cutting the tip of the tube and removing old caulk.
- Painter's tape — The secret weapon of clean caulk lines. More on this below.
- A caulk smoothing tool — Or just a damp fingertip, or the back of a plastic spoon. All three work.
- Clean rags and a spray bottle with water — For latex caulk. For silicone, use mineral spirits.
- Caulk removal tool or an old chisel — For stripping out the old stuff before you start.
Step One: Remove Every Bit of the Old Caulk
You cannot put new caulk on top of old caulk. It will not stick. It will peel off. It will look terrible. This is the single biggest mistake beginners make, and it's the one that takes the most patience to avoid.
Use a caulk removal tool, a plastic putty knife, or an old chisel to pry up and scrape out every last bit of old caulk. If there's mold or mildew in the old joint, spray it with a bleach solution first and let it sit for ten minutes — you want a clean surface, not one contaminated with spores that'll grow right back through your new bead.
Once you've scraped it all off, run your finger along the joint. If you feel any ridges, residue, or tacky spots, keep going. For silicone specifically, a product called caulk softener can help break down stubborn leftover bits — apply it, wait a few hours, then scrape.
Step Two: Clean and Dry Thoroughly
After the old caulk is gone, wipe down the joint with rubbing alcohol on a clean rag. This removes soap scum, skin oils, and any residue that will prevent the new caulk from bonding. Then let it dry completely. I mean completely — give it at least an hour in a well-ventilated bathroom, or run a fan. Any moisture trapped under new silicone will show up as a hazy, cloudy streak and possibly as mold within weeks.
Pro Tip
For tub and shower surrounds, fill the tub with water before you caulk. The weight pulls the tub down into its final resting position. If you caulk an empty tub, the joint will stretch and crack the first time someone takes a bath. This one trick will extend the life of your caulk line by years.
Step Three: Tape Both Sides of the Joint
Here's the single biggest secret to pro-looking caulk lines: painter's tape. Run a strip of tape along each side of the joint, leaving a narrow gap in the middle where the caulk will go. The gap should be about as wide as the finished bead you want — typically an eighth to a quarter inch.
Press the tape down firmly so caulk can't seep under it. This takes five extra minutes and is worth every second. When you pull the tape off later, you'll have perfectly crisp, straight lines that look like they were done by someone who's been doing this for twenty years.
Step Four: Cut the Tip the Right Way
The shape of your caulk bead starts at the tip of the tube. Most people cut the tip too big and end up with a fat, ugly bead. Start small — you can always cut more off, but you can't add it back.
Cut the tip at a 45-degree angle, about a quarter inch from the end. Then push a long nail or wire down through the tip to puncture the inner seal. If you skip puncturing the seal, you'll squeeze the gun and nothing will come out, which is frustrating and a guaranteed way to accidentally blow the tip off the tube.
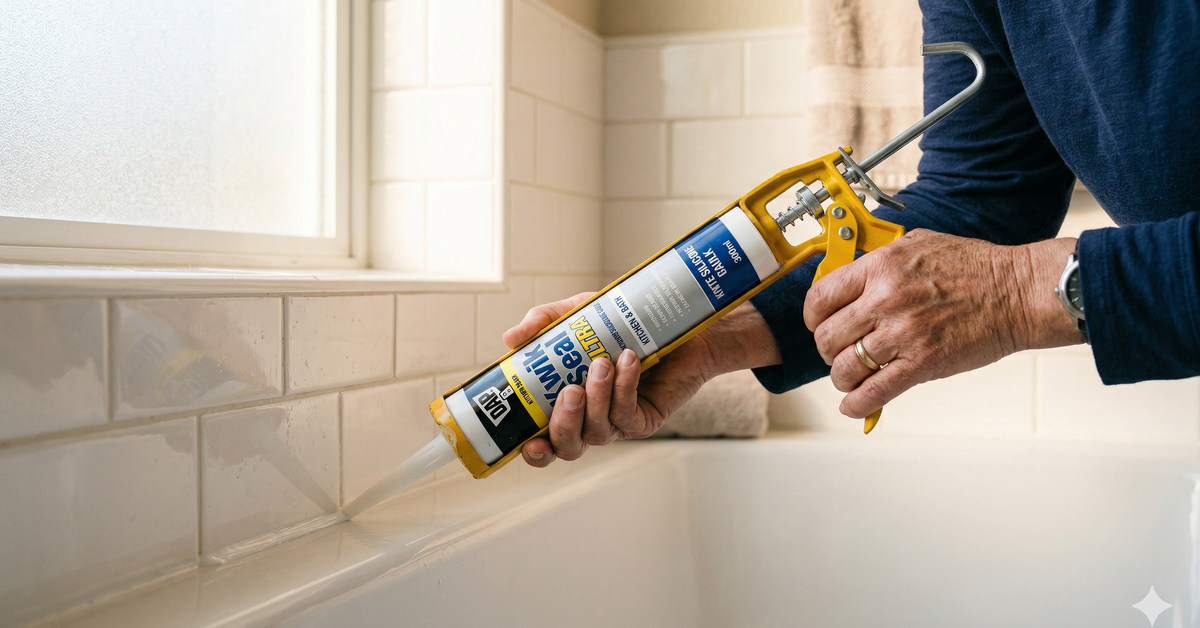
Step Five: The Actual Bead
Hold the gun at a 45-degree angle with the cut facing into the joint. Start at one corner and pull the gun toward you in a smooth, steady motion. Pull, don't push. Pulling gives you more control and lets you see what's coming out.
Keep the trigger pressure consistent and move at a steady pace — roughly the same speed you'd use to sign your name. Too slow and you'll pile up caulk; too fast and you'll get gaps and thin spots. If you feel the gun want to stop, keep your hand moving anyway and trust the flow.
Don't try to do a ten-foot joint in one pass unless you're already experienced. Work in sections of two to three feet, then stop, tool the bead, and continue. The tooled section will blend seamlessly with the next one if you overlap slightly.
Step Six: Tooling the Bead
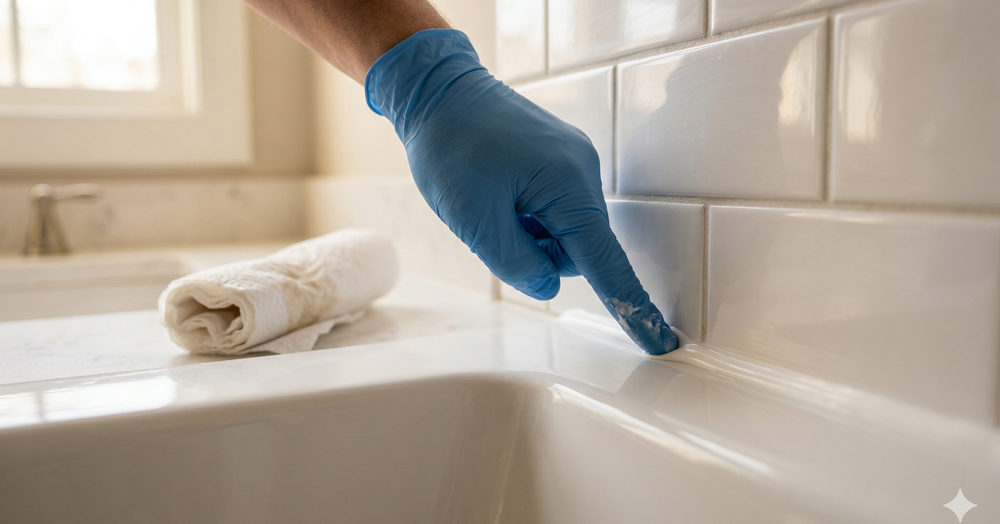
Tooling is the step that turns a blob of caulk into a clean, concave, professional-looking joint. Within a couple of minutes of laying the bead, while it's still wet, run a smoothing tool or a damp fingertip along the line in one continuous pull.
For latex caulk, dip your finger in water first. For silicone, dip it in mineral spirits or a light dish soap solution — water doesn't work well with silicone and will leave you with a mess. Press gently into the joint so you create a slight concave shape that directs water out rather than letting it pool.
Wipe excess caulk off your finger onto a rag between passes. Don't wipe it onto the tape, the wall, or your pants. (I've done all three.)
Step Seven: Pull the Tape Immediately
This is critical: pull the painter's tape off while the caulk is still wet. Do not wait until it dries. If you wait, the dried caulk on top of the tape will tear the edge of your fresh bead and ruin the line you just made.
Pull the tape slowly and at a 45-degree angle away from the joint. You'll see a clean, razor-sharp edge appear as you go. If you notice any little tags or pulls as the tape comes off, smooth them out right away with a damp finger before they set up.
Step Eight: Let It Cure
Latex caulk skins over in about 30 minutes and is paintable in 2–4 hours. Silicone skins over faster but takes 24 hours to fully cure — and for bathtubs specifically, I'd wait a full 48 hours before running water over the joint. Seriously. I know you want to shower. Use the other bathroom or go to a friend's house. Rushing this step is how new caulk fails early.
Pro Tip
If your first bead doesn't come out perfect, don't try to patch it mid-bead. Let the whole thing cure completely, cut out the bad section with a utility knife, and redo just that piece. Trying to "fix" wet caulk with more wet caulk almost always makes it worse.
Common Mistakes to Avoid
- Caulking over soap scum or mildew. It will not stick and will look cloudy within weeks.
- Using silicone where you need to paint. Paint does not adhere to silicone. Ever. Use latex for anywhere that'll be painted.
- Skipping the tape. You can get away with this on a small touch-up, but for any visible joint, the tape is what separates amateur from pro work.
- Applying too much caulk. More is not better. A big sloppy bead looks amateurish and takes forever to cure.
- Caulking in humid bathrooms with the fan off. Trapped moisture equals mold under the bead. Run the fan for an hour after finishing.
When to Caulk vs. When to Use Something Else
Caulk is for narrow, flexible joints up to about a quarter inch wide. If your gap is bigger than that, caulk will sag, crack, and fail. For larger gaps, use backer rod (a foam cord you push into the joint first) and then caulk over it, or switch to an expanding foam or patching compound depending on the situation.
If the joint moves a lot — like between dissimilar materials that expand and contract at different rates — make sure your caulk is rated for that movement. Regular bathroom caulk can handle a little movement; structural joints need a polyurethane rated for high movement.
And if you're working on the outside of your house, wait for a dry day with temperatures above 50°F and no rain in the forecast for 24 hours. Cold, wet, or freezing conditions will ruin the bond. This is also a good one to pair with an annual spring maintenance walkthrough — check all your exterior caulk at the same time you're checking everything else.
The Short Version
If you remember nothing else from this guide, remember this: remove all the old caulk, clean and dry the joint thoroughly, tape both sides, cut the tip small, pull the gun toward you, tool the bead while wet, and pull the tape immediately. Those seven things are ninety percent of what pros actually do differently from beginners.
Caulking is genuinely one of the most satisfying small home improvement skills to pick up. Once you've done one clean joint and seen how sharp it looks, you'll start noticing bad caulk everywhere — and you'll have the skill to fix it. Start with one small project, like the edge of a kitchen backsplash or a short section of baseboard, and work your way up to a full tub surround.